How to bridge
Bridging your tokens allows you to transfer assets between cysic chain and base/bsc chain. This guide walks you through the entire process, from connecting your wallet to completing a cross-chain transfer.
Prerequisites
Before you begin, make sure you have the evm wallet browser extension installed. Additionally, ensure you have sufficient balance of the tokens you wish to bridge and enough native tokens to cover transaction fees on the source chain.
Connecting Your EVM Wallet
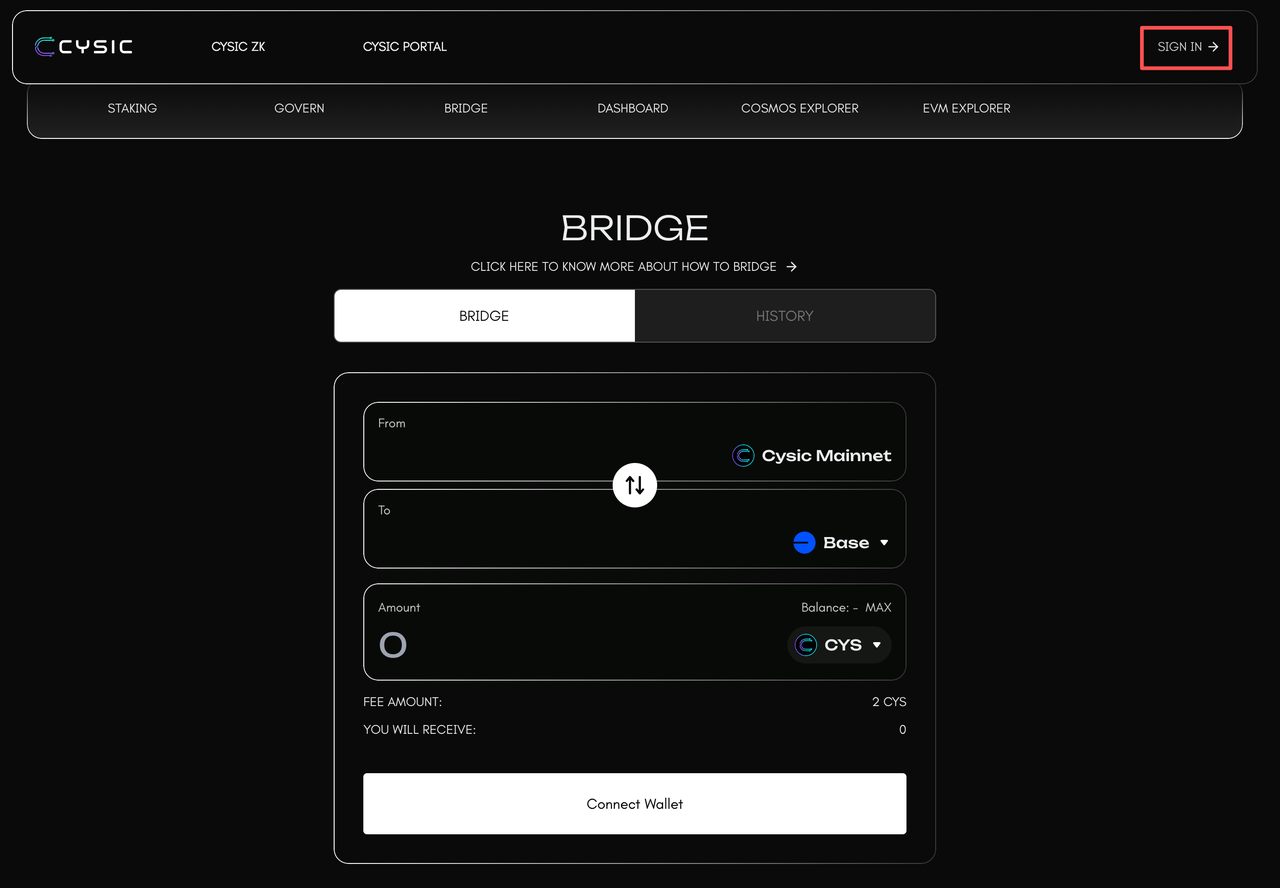
To get started, navigate to the bridge dashboard and click the "SIGN IN" button.
A prompt will appear asking you to approve the connection request.
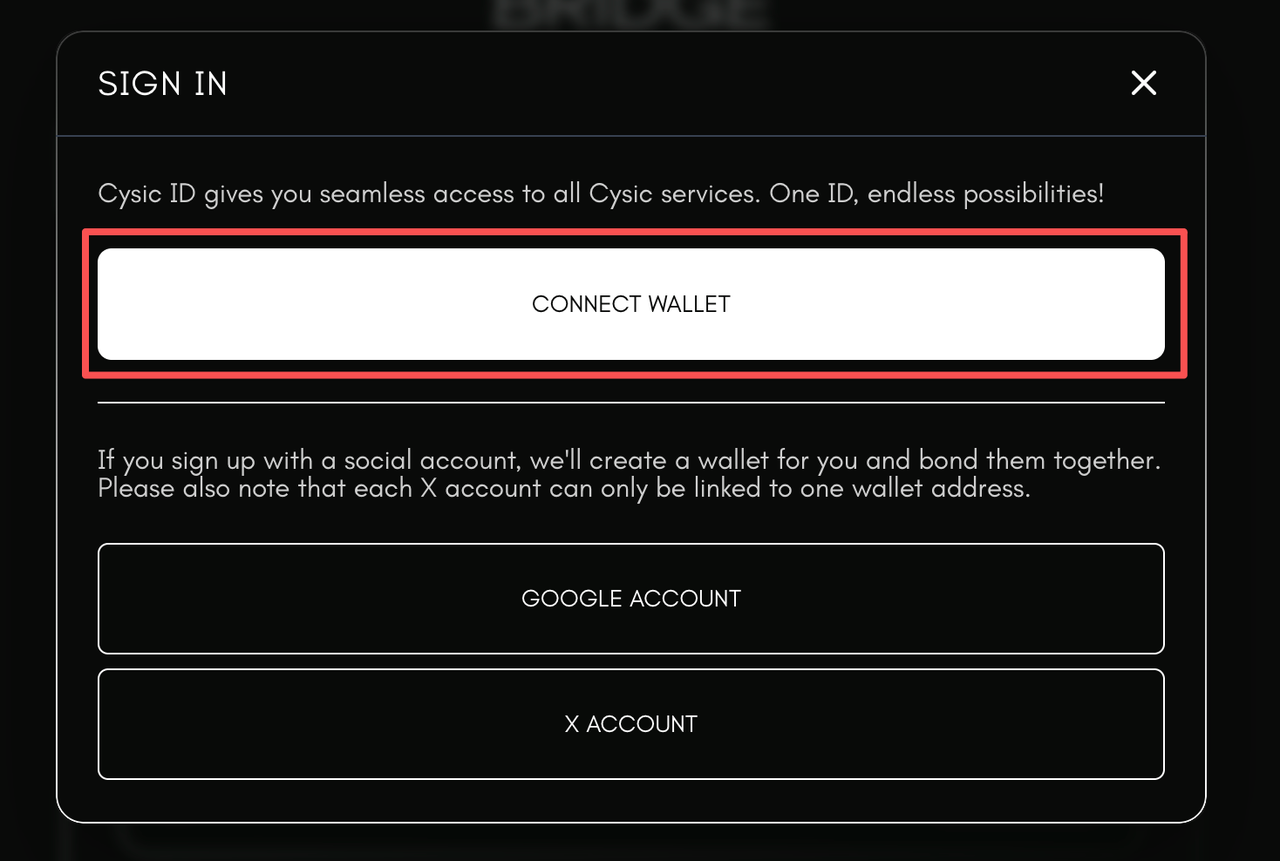
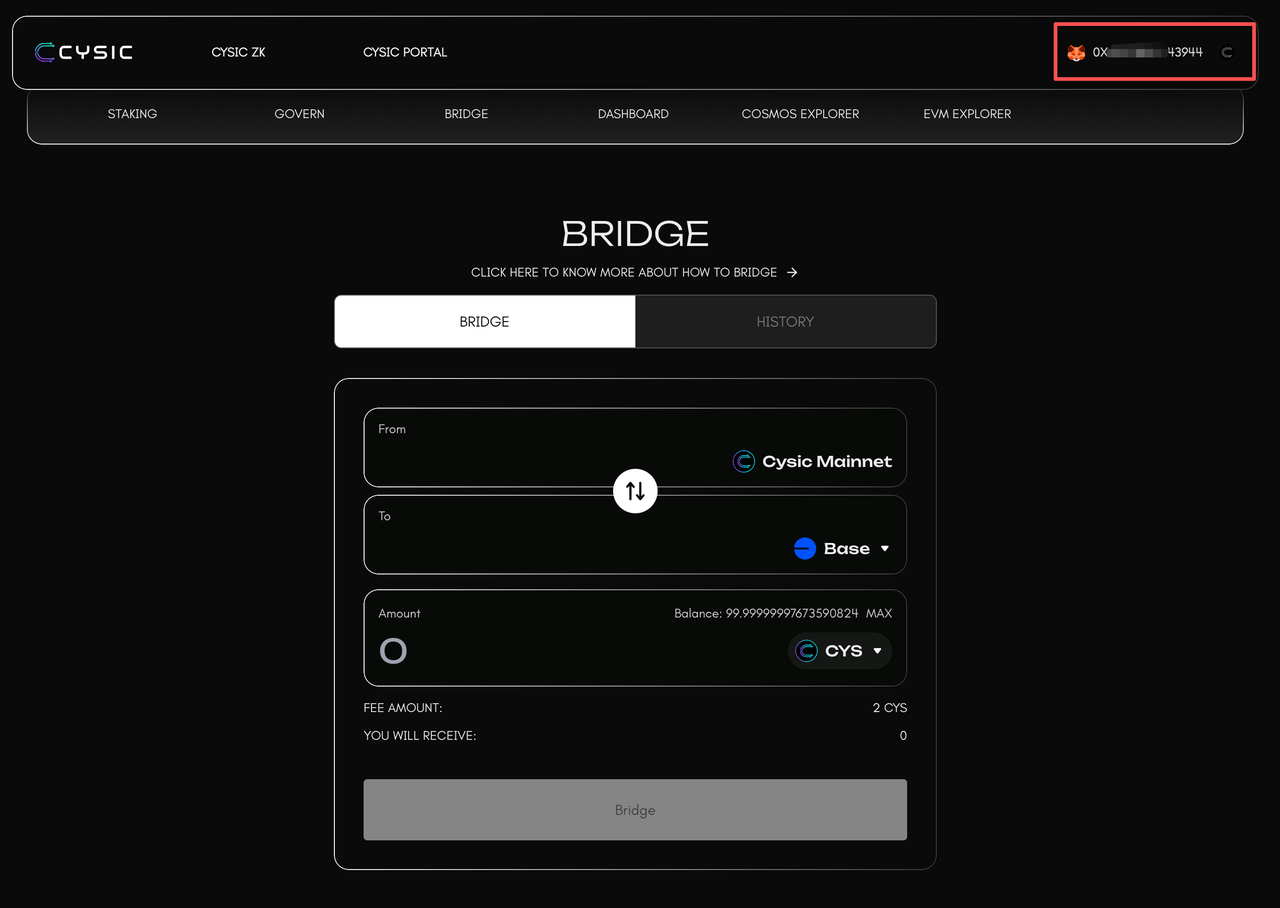
Once approved, your wallet address will be displayed on the interface, confirming a successful connection.
Checking Your Token Balance
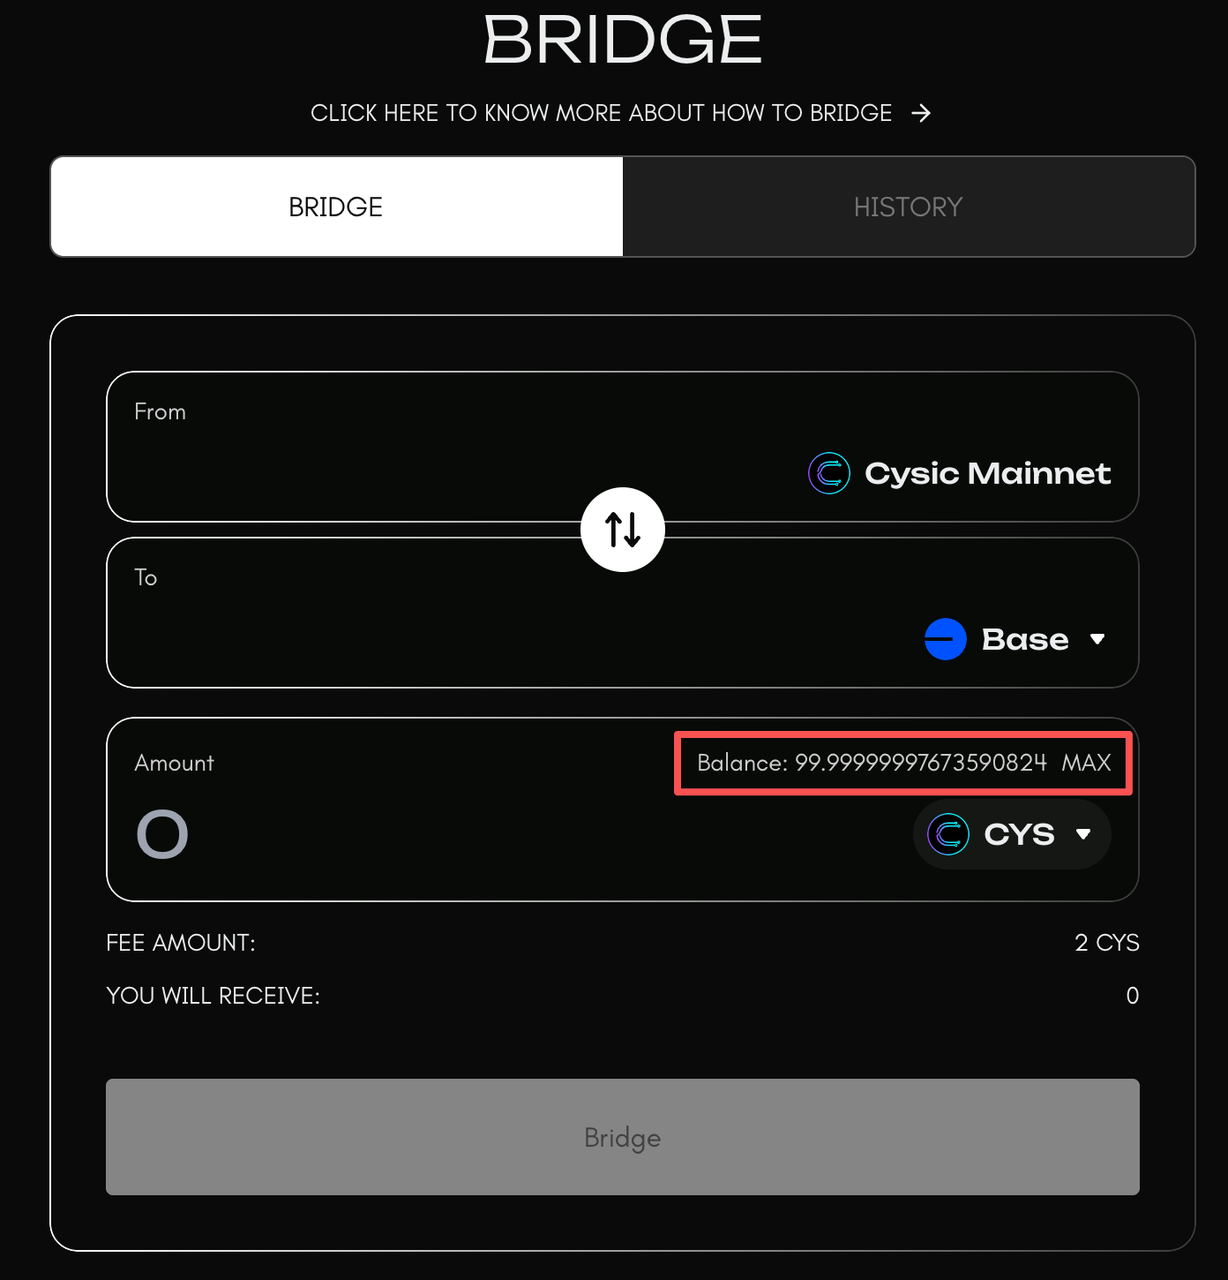
After connecting your wallet, you'll be able to view your available token balances directly on the dashboard. This shows the total amount of tokens you have available for bridging.
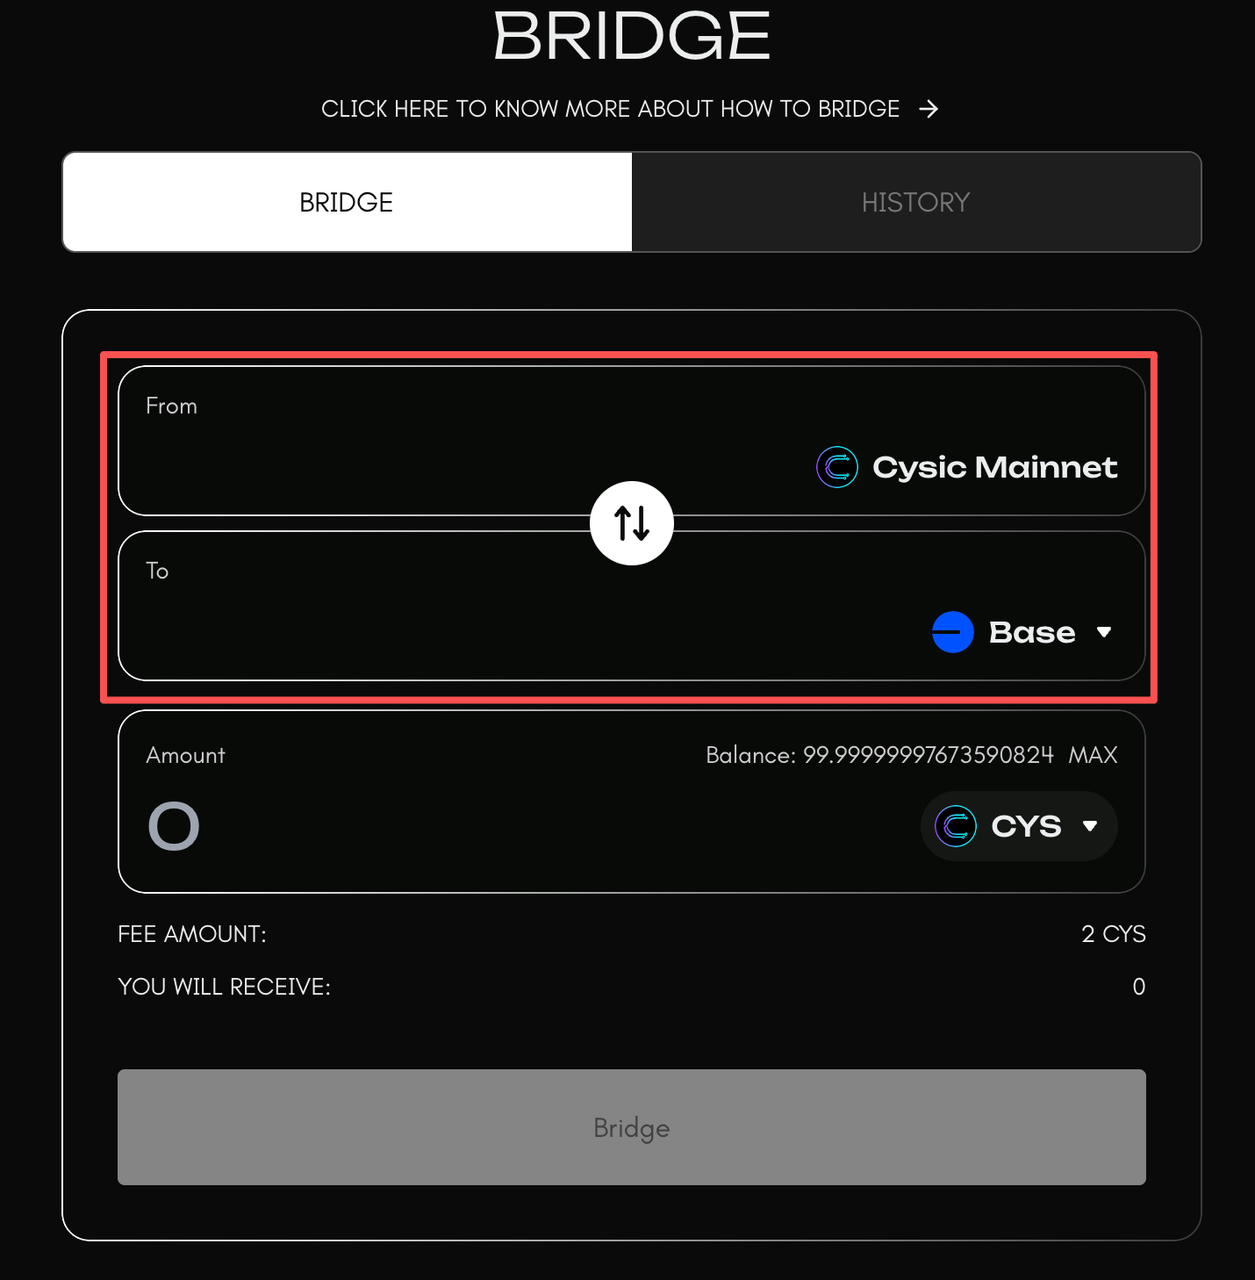
Selecting Source and Destination Chains
The next step is choosing which chains you want to bridge between. The bridge interface displays all supported blockchain networks. Select your source chain (where your tokens currently are) and your destination chain (where you want to send them). Make sure both chains are supported and that the token you want to bridge is available on both networks. The bridge supports transfers between Cysic chain and various side chains including BSC and Base.
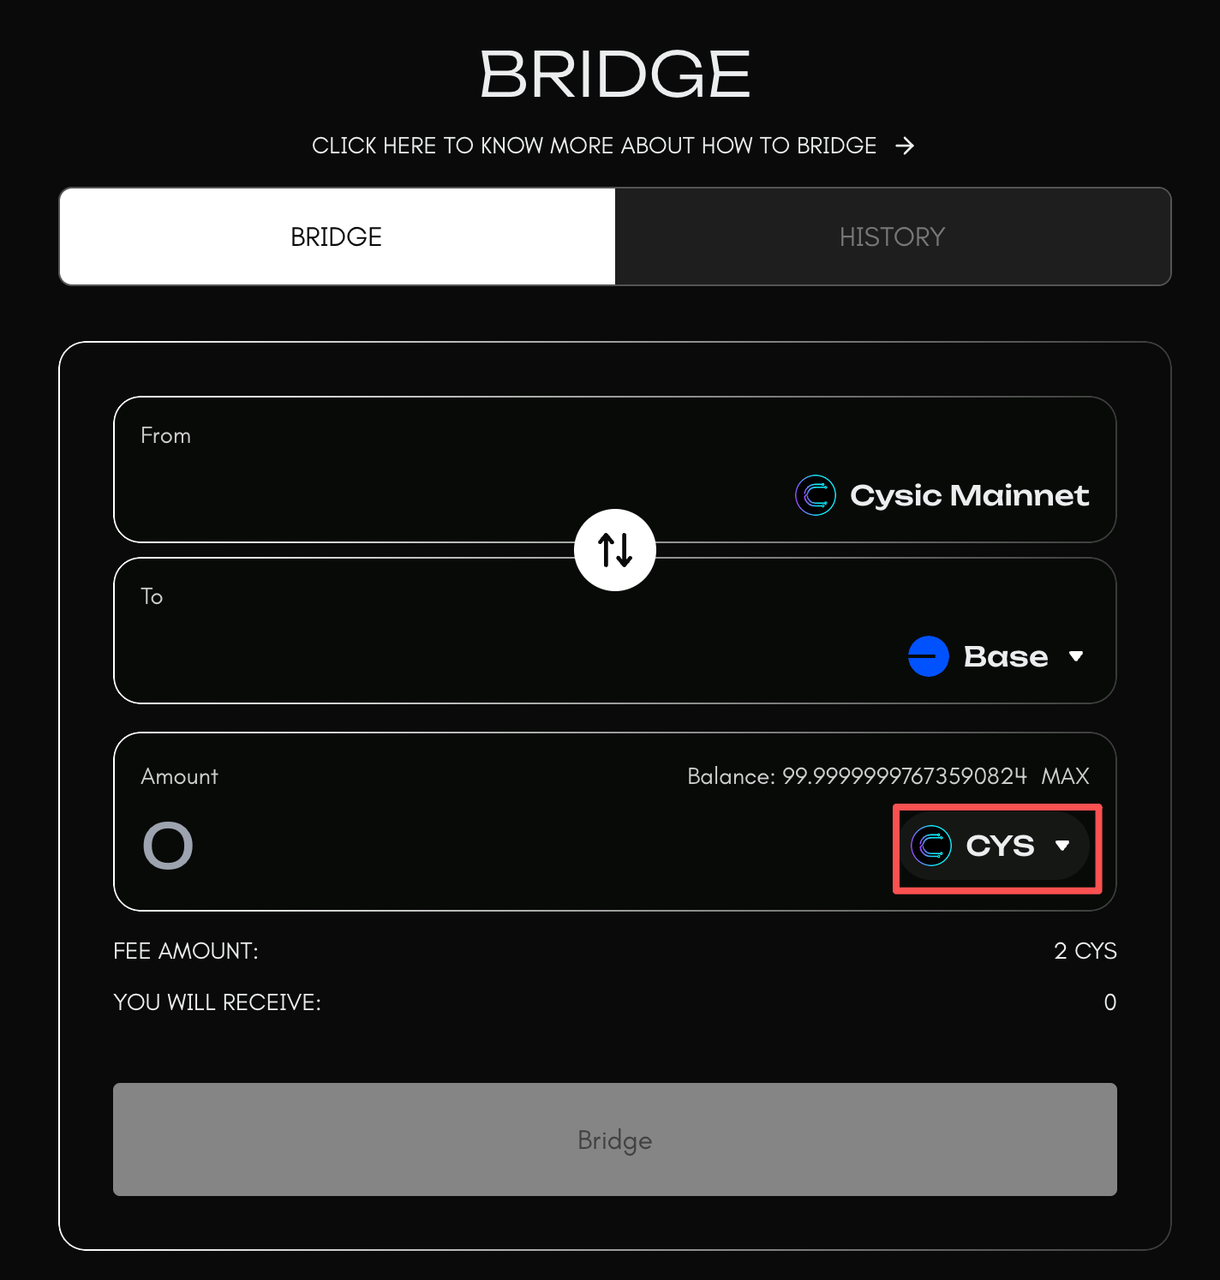
Choosing a Token
Once you've selected your chains, choose the token you want to bridge from the available token list. When selecting a token, verify that it's supported on both the source and destination chains. The interface will display the token symbol, available balance, and any applicable fees for the transfer.
Initiating a Bridge Transfer
After selecting your token, enter the amount you wish to bridge. Keep in mind that you should leave a small amount of native tokens to cover transaction fees on source chains. Review all the details including the source chain, destination chain, token amount, and fee amount. Once you've confirmed everything is correct, click the "Bridge" button and approve the transaction in your evm wallet. The bridge will lock or burn your tokens on the source chain and initiate the cross-chain transfer process.
![]()
Monitoring Your Transfer
After initiating the transfer, you can monitor its status on the bridge dashboard. The transfer will go through several stages: pending, processing, and completed. You can track the transaction hash on both the source and destination chains. The bridge uses validator signatures to secure cross-chain transfers, which may take some time depending on network conditions. Typically, transfers are completed within a few minutes, but this can vary based on network congestion.
![]()
Receiving Tokens
Once the bridge validators have processed your transfer and verified the transaction, your tokens will be minted or unlocked on the destination chain and sent to your specified recipient address. You'll receive a confirmation notification when the transfer is complete. You can then check your wallet balance on the destination chain to verify that the tokens have arrived successfully.